Aroma ARC-1010SB - Rice Cooker, Multicooker & Food Steamer Manual
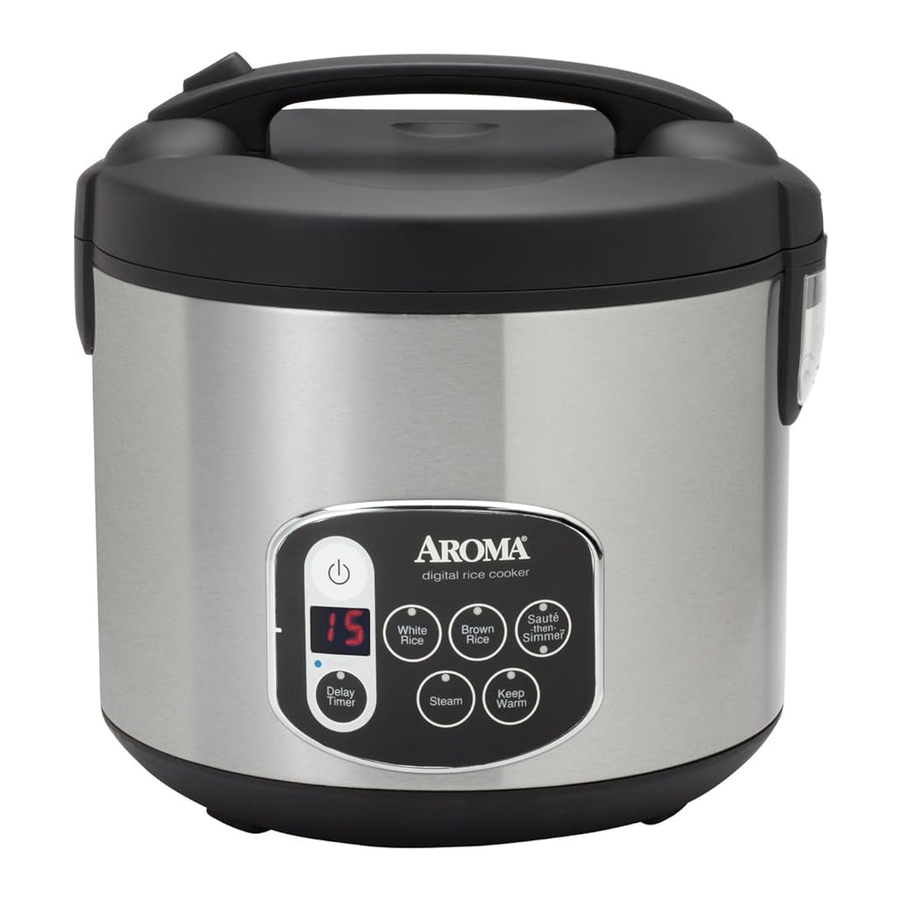

Congratulations on your purchase of the Aroma ® 20-Cup Digital Rice Cooker, Multicooker and Food Steamer. In no time at all, you'll be making fluffy, delicious rice at the touch of a button! Whether long, medium or short grain, this cooker is specially calibrated to prepare all varieties of rice, including tough-to-cook whole grain brown rice, to fluffy perfection.
In addition to rice, your new Aroma ® Rice Cooker is ideal for healthy, one-pot meals for the whole family. The convenient steam tray inserts directly over the rice, allowing you to cook moist, fresh meats and vegetables at the same time, in the same pot. Steaming foods locks in their natural flavor and nutrients without added oil or fat, for meals that are as nutritious and low-calorie as they are easy.
Aroma ® 's Sauté-Then-Simmer ™ Technology is ideal for the easy preparation of Spanish rice, risottos, pilafs, packaged meal helpers, stir frys and more stovetop favorites!
But it doesn't end there. Your new rice cooker is also great for soups, stews, stocks, gumbos, jambalaya, breakfast frittata, dips and even desserts!
Several delicious recipes are included at the back of this manual, and even more are available online at www.AromaTestKitchen.com
This manual contains instructions for using your rice cooker and its convenient pre-programmed digital settings, as well as all of the accessories included. There are also helpful measurement charts for cooking rice and steaming.
Several delicious recipes are included at the back of this manual, and even more are available online at www.AromaTestKitchen.com
For more information on your Aroma® Rice Cooker, or for product service, recipes and other home appliance solutions, please visit us online at www.AromaCo.com
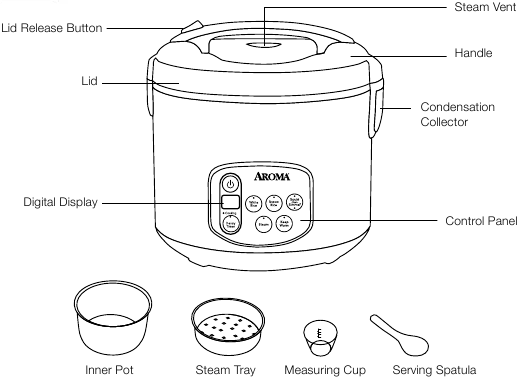
PARTS IDENTIFICATION

- Do notusetheprovidedservingspatulatosauté. It is not intended to be used in contact with high temperatures. Use a long-handled wooden or heat- safe spoon to stir food while sautéing.
Digital Controls
 |  Button Button
Turns the rice cooker on and off. |
 | Delay Timer
Allows for rice to be ready right when it's needed. Add rice and water in the morning and come home to delicious rice ready to eat! |
 | White Rice
Cooks fluffy, delicious rice automatically. |
 | Brown Rice
Is ideal for cooking brown rice and other tough-to-cook whole grains to perfection. |
 | Sauté-then-Simmer™
Is able to sauté foods at a high heat and automatically switch over to its simmer mode once liquid is added. It's perfect for Spanish rice, chili, risotto, stir frys and much more! |
 | Steam
Is perfect for healthy sides and main courses. Set the time food needs to steam, it will begin to countdown once water reaches a boil and shut off once time has elapsed. |
 | Keep Warm
Is perfect for keeping food warm and ready to serve. The rice cooker automatically switches over to "Keep Warm" once rice is finished cooking. |
BEFORE FIRST USE & TO CLEAN
- Read all instructions and important safeguards.
- Remove all packaging materials and check that all items have been received in good condition.
- Tear up all plastic bags and dispose of properly as they can pose a risk to children.
- Wash steam vent and all other accessories in warm, soapy water. Rinse and dry thoroughly.
- Remove the inner pot from rice cooker and clean with warm, soapy water. Rinse and dry thoroughly before returning to cooker.
- Wipe body clean with a damp cloth.
- Removethesteam vent.
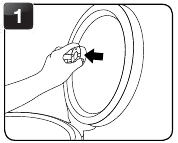
- Removethecondensationcollector.
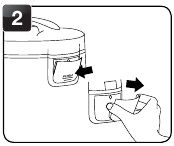
- Wash theinnerpotandallaccessoriesbyhandor in the dishwasher.
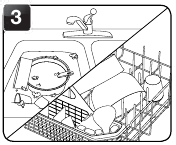
- Wipericecookerbodycleanwithadamp cloth.
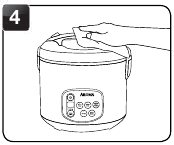
- Thoroughly dry ricecookerbodyandall accessories.
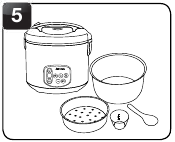
- Reassemble for next use.
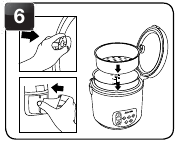
NOTE
- Do not immerse the rice cooker base, cord or plug in water at any time.
- Do not use harsh abrasive cleaners, scouring pads or products that are not considered safe to use on nonstick coatings.
- If washing in the dishwasher, a slight discoloration to the inner pot and accessories may occur. This is cosmetic only and will not affect performance.
- Any other servicing should be performed by Aroma® Housewares.
TO COOK RICE

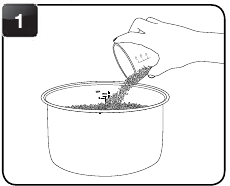
- Using the provided measuring cup, add rice to the inner pot.
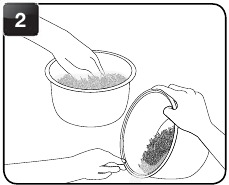
- Rinse rice to remove excess starch. Drain.
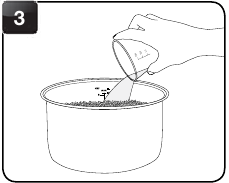
- Fill with water to the line which matches the number of cups of rice being cooked.
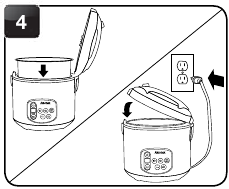
- Place the inner pot into the rice cooker. Close the lid securely. Then plug the power cord into a 120V AC outlet.
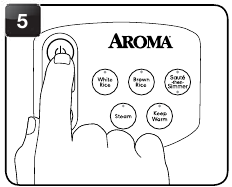
- Press the
 button to turn on the rice cooker.
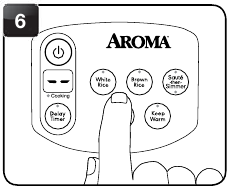
- Press the WHITE RICE or BROWN RICE button, depending upon the type of rice being cooked.
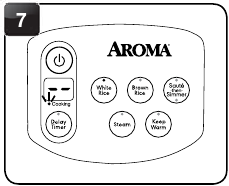
- The rice cooker will now begin cooking. The COOKING indicator light will illuminate.
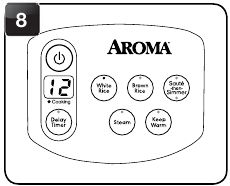
- The rice cooker will countdown the final minutes of cook time (12 minutes for white rice and 25 minutes for brown rice).
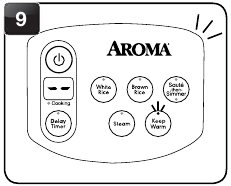
- Oncericeisfinished,thericecookerwillbeepandautomaticallyswitch to "Keep Warm."
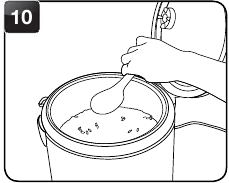
- Forbetterresults,stirthericewiththeservingspatulatodistribute any remaining moisture.
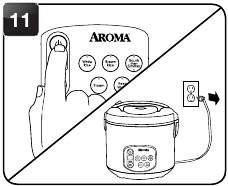
- When finishedservingrice,turnthericecookeroffbypressing the
 button twiceandunplug the power cord.
NOTE:
- Before placing the inner pot into the rice cooker, check that it is dry and free of debris. Adding the inner pot when wet may damage the rice cooker.
- Brown rice requires a much longer cooking cycle than other rice varieties due to the extra bran layers on the grains. The "Brown Rice" function on this rice cooker allows extra time and adjusted heat settings in order to cook the rice properly. If it appears the rice cooker is not heating up immediately on the "Brown Rice" setting, this is due to a low-heat soak cycle that preceeds the cooking cycle to produce better brown rice results.
- Rice should not be left in the rice cooker on "Keep Warm" for more than 12 hours.
HELPFUL HINTS
- If you misplace the measuring cup, a ¾ standard US cup is an exact replacement.
- To add more flavor to rice, try substituting a favorite meat or vegetable broth or stock. The ratio of broth/stock to rice will be the same as water to rice.
- For approximate rice cooking times and suggested rice/water ratios, see the "Rice/Water Measurement Table".
RICE/WATER MEASUREMENT TABLE
| UNCOOKED RICE | RICE WATER LINE INSIDE POT | APPROX. COOKED RICE YIELD | COOKING TIMES |
| 2 Cups | Line 2 | 4 Cups | WHITE RICE: 30-35 Min.
BROWN RICE: 80-85 Min. |
| 3 Cups | Line 3 | 6 Cups | WHITE RICE: 32-37 Min.
BROWN RICE: 82-87 Min. |
| 4 Cups | Line 4 | 8 Cups | WHITE RICE: 34-39 Min.
BROWN RICE: 85-90 Min. |
| 5 Cups | Line 5 | 10 Cups | WHITE RICE: 38-43 Min.
BROWN RICE: 87-92 Min. |
| 6 Cups | Line 6 | 12 Cups | WHITE RICE: 40-45 Min.
BROWN RICE: 90-95 Min. |
| 7 Cups | Line 7 | 14 Cups | WHITE RICE: 41-46 Min.
BROWN RICE: 93-98 Min. |
| 8 Cups | Line 8 | 16 Cups | WHITE RICE: 43-48 Min.
BROWN RICE: 95-100 Min. |
| 9 Cups | Line 9 | 18 Cups | WHITE RICE: 44-49 Min.
BROWN RICE: 98-103 Min. |
| 10 Cups | Line 10 | 20 Cups | WHITE RICE: 48-51 Min.
BROWN RICE: 100-105Min. |
HELPFUL HINTS
- Rinse rice before placing it into the inner pot to remove excess bran and starch. This will help reduce browning and sticking to the bottom of the pot.
- Want perfect brown rice without the wait? Use the "Delay Timer." Simply add rice and water in the morning and set the "Delay Timer" for when rice will be needed that night. See "To Use The Delay Timer" for more details.
- This chart is only a general measuring guide. As there are many different kinds of rice available rice/water measurements may vary.
TO USE THE DELAY TIMER

Follow steps 1 to 5 of "To Cook Rice".
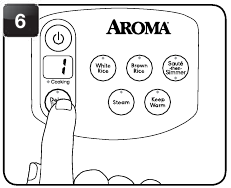
- Press the DELAY TIMER button. Each press increases in one hour increments. It may be set to have rice ready in 1 to 15 hours for WHITE RICE and 2 to 15 hour for BROWN RICE.
- Once the needed time is selected, press the WHITE RICE or BROWN RICE button, depending on the rice being cooked.
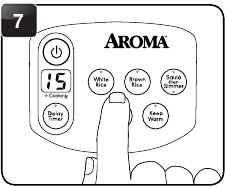
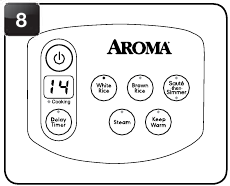
- The digital display will countdown from the time selected.
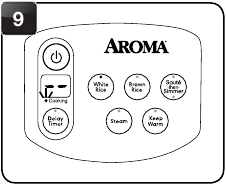
- Once rice begins cooking, the COOKING INDICATOR LIGHT will illuminate.
NOTE: Due to the longer cooking time needed, brown rice may only be delayed for 2 hours or more.
HELPFUL HINTS
- If you misplace the measuring cup, a ¾ standard US cup is an exact replacement.
- To add more flavor to rice, try substituting a favorite meat or vegetable broth or stock. The ratio of broth/stock to rice will be the same as water to rice.
- The rice cooker will countdown the final minutes of cook time (12 minutes for white rice and 25 minutes for brown rice).
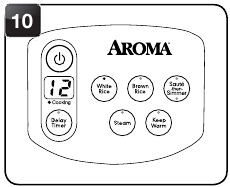
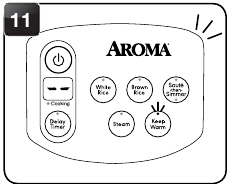
- Once rice is finished, the rice cooker will beep and automatically switch to "Keep Warm."
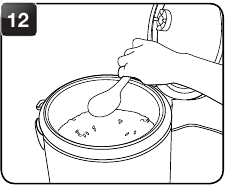
- For better results, stir the rice with the serving spatula to distribute any remaining moisture.
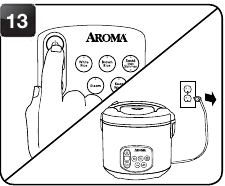
- When finished serving rice, turn the rice cooker off by pressing the
 button twice and unplug the power cord.
NOTE: Rice should not be left in the rice cooker on "Keep Warm" for more than 12 hours.
TO USE SAUTÉ-THEN-SIMMER™
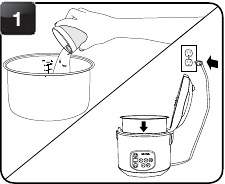
- Add ingredients to be sautéed/ browned to the inner pot. Place the inner pot into the rice cooker. Then plug the power cord into an available 120V AC outlet.
- After a few minutes, the rice cooker will automatically switch to its "Simmer" mode.
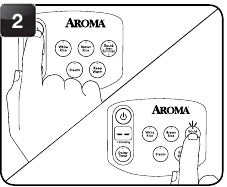
- Then press the
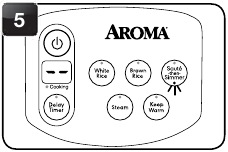
 button to turn on the rice cooker. Then press the SAUTÉ-THEN-SIMMER™ button to begin sautéing.
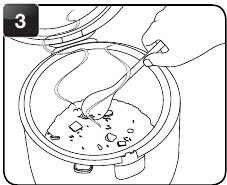
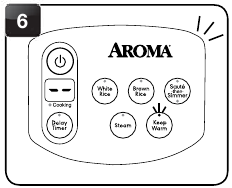
- Once the meal has cooked, the rice cooker will beep and automatically switch over to "Keep-Warm."
- Using a long-handled wooden spoon, stir ingredients until sautéed/ browned to the desired level.
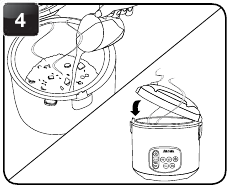
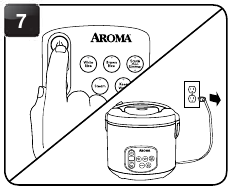
- When finished serving, turn the rice cooker off by pressing the
 button twice and unplug the power cord.
- Add other called for ingredients and liquid to the inner pot. Close the lid securely and allow the rice cooker to cook.

- Do not use the provided servingspatula to sauté. It is not intended to be used in contact with high temperatures. Use a long-handled wooden or heat-safe spoon to stir food while sautéing.
TO STEAM

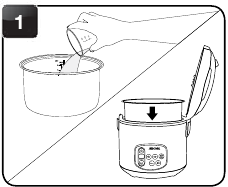
- Using the provided measuring cup, add 3 cups water to the inner pot. Then place the inner pot into the rice cooker.
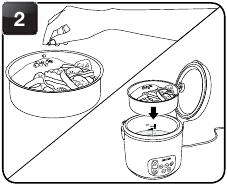
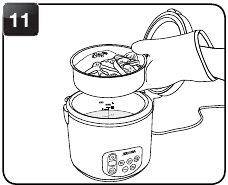
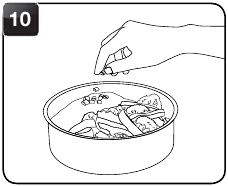
- Place food to be steamed onto the steam tray. Then place the steam tray into the rice cooker.
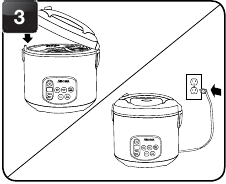
- Close the lid securely. Plug the cord into an available 120V AC outlet.
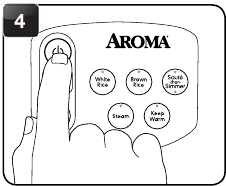
- Press the
 button to turn on the rice cooker.
HELPFUL HINTS
- Smaller foods may be placed on a heat-proof dish and then placed onto the steam tray. Parchment paper or aluminum foil may be used as well. Place the paper/foil in the center of the steam tray and ensure it does not create a seal along the bottom of the steam tray. For best results, it is recommended to puncture small holes in the paper/foil.
- For suggested steaming times and water amounts, see the meat and vegetable steaming tables.
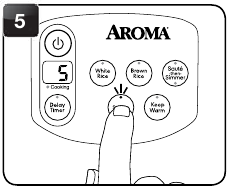
- Press the STEAM button. The digital display will show a flashing 5 to represent five minutes of steam time.
- Each press of the STEAM button will increase steaming time by one minute, up to 30 minutes. After 30 minutes, it will cycle back to five minutes.
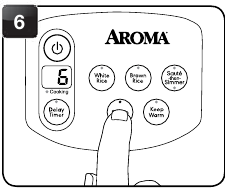
- Once the needed time is selected, the rice cooker will beep to indicate it is setting at the displayed time. It will beep once more and the display will stop flashing to indicate it has set.
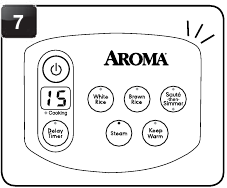
- The COOKING INDICATOR LIGHT will illuminate to indicate it has begun steaming.
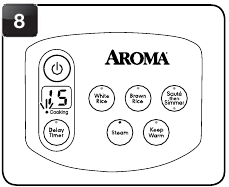
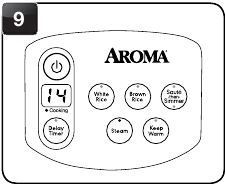
- Once the water reaches a boil, the digital display will countdown in one minute increments from the selected time.
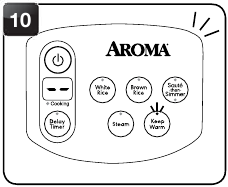
- Once the selected time has passed, the rice cooker will beep and switch to "Keep Warm" mode.
- Check steamed food for doneness. If finished steaming, remove food immediately to avoid overcooking. Wear a protective, heat-resistant glove to prevent possible injury.
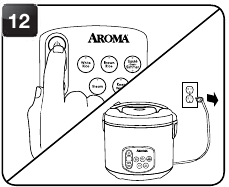
- When finished steaming, turn the rice cooker off by pressing the
 button twice and unplug the power cord.
TO STEAM FOOD & SIMULTANEOUSLY COOK RICE

Follow steps 1 to 9 of "To Cook Rice" beginning.
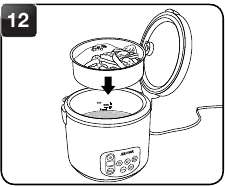
- Place food to be steamed onto the steam tray.
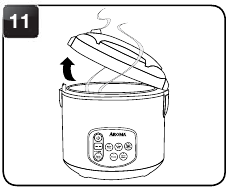
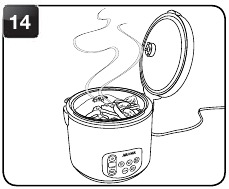
- Using caution to avoid escaping steam, open the lid.
- Place steamtrayintothe rice cooker.
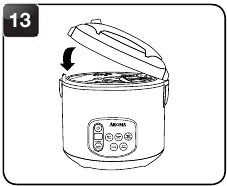
- Closethelid securely.
NOTE
- Do not attempt to cook more than 8cups(uncooked) of rice if steaming and cooking rice simultaneously.
- It is possible to steam at any point during the rice cooking cycle. However, it is recommended that you steam during the end of the cycle so that steamed food does not become cold or soggy before the rice is ready.
HELPFUL HINTS
- Refer to the steaming tables for meats and vegetables for hints and approximate steaming times. See the "Rice/Water Measurement Table" included for approximate rice cooking times.
- Using caution, open the lid to check food for doneness.
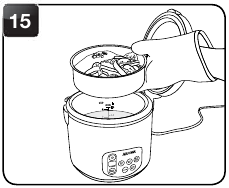
- If food is finished steaming, remove steam tray. When removing steam tray use protective, heat-resistant glove to prevent possible injury.
- Allow the rice cooker to continue cooking rice.
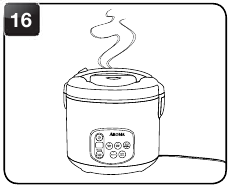
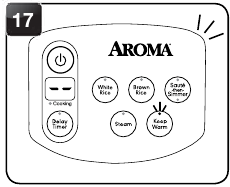
- Once rice is finished, the rice cooker will beep and automatically switch to "Keep Warm."
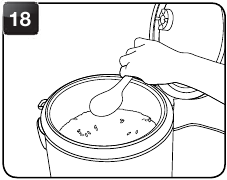
- For best results, stir the rice with the serving spatula to distribute any remaining moisture.
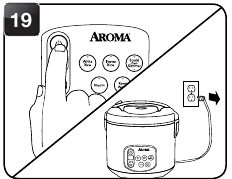
- When finished serving rice, turn the rice cooker off by pressing the
 button twice and unplug the power cord.
NOTE: Rice should not be left in the rice cooker on "Keep Warm" for more than 12 hours.
STEAMING TABLES

When steaming, Aroma® recommends using 3 cups of water with the provided measuring cup.
Meat Steaming Table
| MEAT | STEAMING TIME | SAFE INTERNAL TEMPERATURE |
| Fish | 25 Min. | 140° |
| Chicken | 30 Min. | 165° |
| Pork | 30 Min. | 160° |
| Beef | Medium = 25 Min.
Medium-Well = 30 Min.
Well = 33 Min. | 160° |
Vegetable Steaming Table
| VEGETABLE | STEAMING TIME |
| Asparagus | 20 Minutes |
| Broccoli | 15 Minutes |
| Cabbage | 25 Minutes |
| Carrots | 25 Minutes |
| Cauliflower | 25 Minutes |
| Corn | 25 Minutes |
| Eggplant | 30 Minutes |
| Green Beans | 15 Minutes |
| Peas | 20 Minutes |
| Spinach | 20 Minutes |
| Squash | 20 Minutes |
| Zucchini | 20 Minutes |
HELPFUL HINTS
- Since most vegetables only absorb a small amount of water, thereis noneedtoincreasetheamountofwaterwithalargerserving of vegetables.
- Steaming times may vary depending upon the cut of meat being used.
- To ensure meat tastes its best, and to prevent possible illness, check that meat is completely cooked prior to serving. If it is not, simply place more water in the inner pot and repeat the cooking process until the meat is adequately cooked.
NOTE
- Altitude, humidity and outside temperature will affect cooking times.
- These steaming charts are for reference only. Actual cooking times may vary.
TO COOK SOUPS, STEWS OR CHILIS

- Add ingredients to the inner pot. Then place the inner pot into the rice cooker.
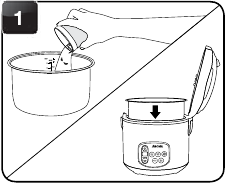
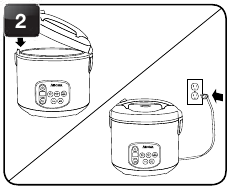
- Close the lid securely. Then plug the cord into an available 120V AC outlet.
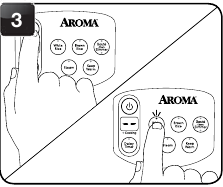
- Press the button to turn on the rice cooker. Then press the WHITE RICE button to begin cooking.
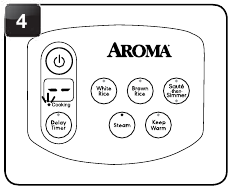
- The COOKING indicator light will illuminate.
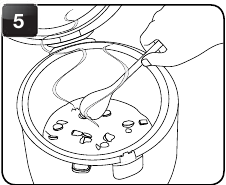
- Using caution to avoid escaping steam, open the lid and stir occasionally with a long-handled wooden spoon.
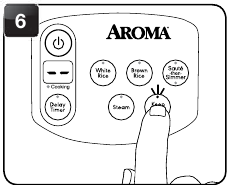
- Once cooking is complete, press the KEEP WARM button to switch the rice cooker to "Keep Warm" mode.
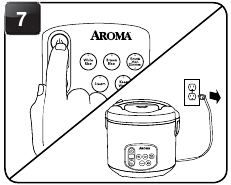
- When finished serving, turn the rice cooker off by pressing the
 button twice and unplug the power cord.
The rice cooker will not switch to "Keep Warm" mode until all liquid is boiled away. Follow the recipe carefully and do not leave the rice cooker unattended.
TROUBLESHOOTING
| Rice is too dry/hard after cooking. | If your rice is dry or hard/chewy when the rice cooker switches to "Keep-Warm" mode, additional water and cooking time will soften the rice. Depending on how dry your rice is, add ½ to 1 cup of water and stir through. Close the lid and press the WHITE RICE button. When rice cooker switches to "Keep-Warm" mode, open the lid and stir the rice to check the consistency. Repeat as necessary until rice is soft and moist. |
| Rice is too moist/soggy after cooking. | If your rice is too moist or soggy when the rice cooker switches to "Keep-Warm" mode, use the serving spatula to stir the rice. This will redistribute the bottom (moistest) part of the rice as well as release excess moisture. Close the lid and allow to remain on "Keep-Warm" mode for 10-30 minutes as needed, opening the lid and stirring periodically to release excess moisture. |
RECIPES

Sauté-Then-Simmer ™ Risotto
Ingredients
¼ cup yellow onion, diced small
1 large garlic clove, chopped fine
1 tbsp. olive oil
1 cup Arborio rice, uncooked
¼ cup vermouth
4 cups chicken broth
1 cup whipping cream
3 tbsp. butter
⅓ cup Parmesan cheese, shredded
Press the button to turn on the rice cooker. Add onion, garlic and olive oil to inner pot. Press the SAUTÉ-THEN-SIMMER ™ button. The sauté indicator light will illuminate. Add rice and mix with a long handled spoon until well coated. Add vermouth and stir until liquid has been absorbed. Stir in the chicken broth and whipping cream; mix well and close the lid securely. SAUTÉ-THEN-SIMMER ™ Technology then will automatically adjust to simmer to cook rice. Once the rice cooker automatically turns to "Keep-Warm," open the lid and stir in butter and Parmesan cheese. Serves 4 to 6.
Sauté-Then-Simmer ™ Spanish Rice
Ingredients
2 tbsp. olive oil (can use up to 1/4 cup)
1 onion, chopped fine
1 garlic clove, minced
2 cups medium or long-grain white rice
2½ cups chicken stock (or vegetable stock if vegetarian)
1 tbsp. tomato paste
Pinch oregano
1 tsp. salt
Press the button to turn on the rice cooker. Add rice, olive oil, onion and garlic to the inner pot. Press the SAUTÉ-THEN-SIMMER ™ button. The sauté indicator light will illuminate. Using a long-handled wooden spoon, stir ingredients frequently and allow to sauté for roughly 5 minutes, or until onion is soft. Add remaining ingredients. SAUTÉ- THEN-SIMMER ™ Technology will then will automatically adjust to simmer to cook rice. Close the lid securely and allow to cook. Once rice is finished, the rice cooker will automatically switch to "Keep-Warm" mode. Serves 4 to 6.
Green Chile Chicken and Rice
Ingredients
1½ cups rice
3 cups chicken broth
2 tbsp. diced minced onion
½ tsp. salt
1 10-oz. can chicken breast chunks, with liquid
1 4-oz. can diced green chiles, with liquid
Press the button to turn on the rice cooker. Place all ingredients in the inner pot and stir. Place inner pot into the rice cooker, cover and press the WHITE RICE button. Allow to cook until rice cooker switches to "Keep-Warm" mode. Add salt to taste. Stir and serve immediately as a main course. Serves 4.
San Antonio Rice
Ingredients
1 cup rice
1 jar (12 oz.) fresh salsa, mild or hot
1 tbsp. vegetable oil
1 cup fresh or canned corn kernels
½ tsp. ground cumin
½ tsp. salt
1¼ cups water
- Fresh ground pepper, to taste
- Fresh minced cilantro, for garnish

Press the button to turn on the rice cooker. Add all ingredients except cilantro to the inner pot, stir, close the lid and press the WHITE RICE button. When rice cooker switches to "Keep-Warm" mode, open the lid, quickly stir and re-cover. Allow to stand for 8-10 minutes before serving. Spoon onto a serving dish, garnish with fresh cilantro and serve. Makes a flavorful supper or side dish for grilled chicken or fish. Serves 3-4.
In the event of a warranty claim, or if service is required for this product, please contact Aroma® customer service toll-free at:
1-800-276-6286
M-F, 8:30AM-4:30PM, Pacific Time
Or we can be reached online at CustomerService@AromaCo.com.
AROMA HOUSEWARES COMPANY
6469 Flanders Drive
San Diego, California 92121 1-800-276-6286
M-F, 8:30 AM - 4:30 PM, Pacific Time
Questions or concerns about your rice cooker?
Before returning to the store.
Aroma's customer service experts are happy to help.
Call us toll-free at 1-800-276-6286
Answers to many common questions and even replacement parts can be found online.
Visit www.AromaCo.com/Support

www.AromaTestKitchen.com

/AromaHousewares
Published By:
Aroma Housewares Co. 6469 Flanders Drive San Diego, CA 92121 U.S.A.
1-800-276-6286
www.AromaCo.com
©2016 Aroma Housewares Company
All rights reserved.

Documents / Resources
References
 Rice Cooker Recipes - Slow Cook, Steam and Grill - Aroma Housewares
 Kitchen Countertop Cooking Products - Aroma Housewares
 FAQs - Kitchen Appliance FAQs - Aroma Housewares
Download manual
Here you can download full pdf version of manual, it may contain additional safety instructions, warranty information, FCC rules, etc.


 Button


 button to turn on the rice cooker.


 button twiceandunplug the power cord.


 button twice and unplug the power cord.


 button to turn on the rice cooker. Then press the SAUTÉ-THEN-SIMMER™ button to begin sautéing.


 button twice and unplug the power cord.


 button to turn on the rice cooker.


 button twice and unplug the power cord.


 button twice and unplug the power cord.


 button twice and unplug the power cord.


